The RV Project Trailer Build: Part 2
By Spenser Tang-Smith.
This is the second installment in a three-part series from Spenser Tang-Smith, one half of The RV Project’s dynamic duo. Along with his partner Vikki Glinskii, The RV Project is their adventure across America in search of the country’s best climbing and most interesting people. All photos courtesy of RV Proj. If #Vanlife has lost its luster, Spenser’s here to give you beta on the new-new: TrailerLife. You can find Part 1 here.
Those Deets
*It’s beyond the scope of this post to explain the basics of amps-volts-watts. Rather than paraphrasing, I’ve linked to resources that do a great job of providing some foundational electrical engineering information.
We have a Pace American cargo trailer from 2002. It is essentially an 8′ x 10′ rectangle with a triangular V-nose on the front that adds another 20 sq. ft. The ceiling is about 7½’ from the floor, which, for my 6’2″, is fantastic. The back wall also acts as a loading ramp when opened. They say you need work-life separation, so we decided to put the office in the V-part up front, and the living quarters and galley toward the back.
The Office

For our current big project, we are using a 27” iMac in conjunction with a 30” monitor. We have a pair of G-RAID hard drives for working and backup (project assets are over 6TB so far). We have a potpourri of other hard drives containing backups of all the media we’ve collected during our time on the road.
We also wanted to streamline the process of capturing media in the wild, then dumping it onto hard drives and charging camera batteries. Hence we have a wider cabinet/desk on the left, on which we can sort and clean camera gear so it’s ready for the next shoot. Memory cards and batteries are then passed to the right, where the computer and power points await for backing up and charging, respectively. As you can see from the photo, the whiskey lives on this desk as well.
Electrons, and How to Use Them
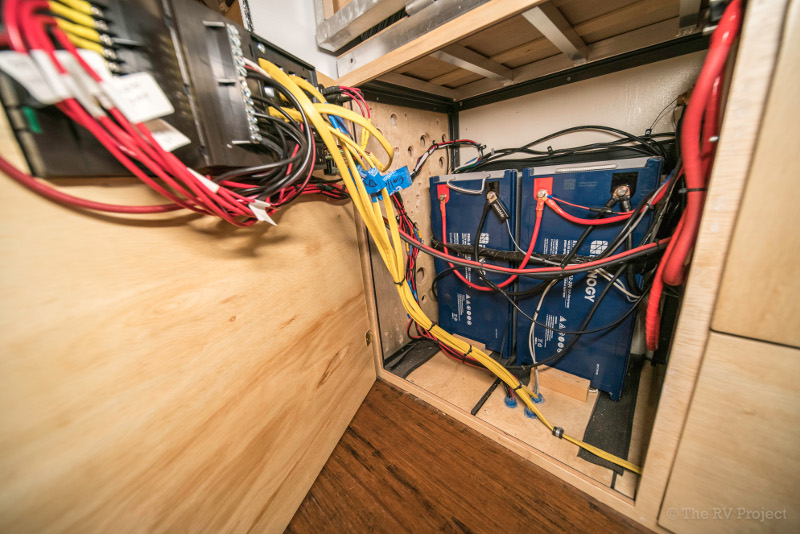
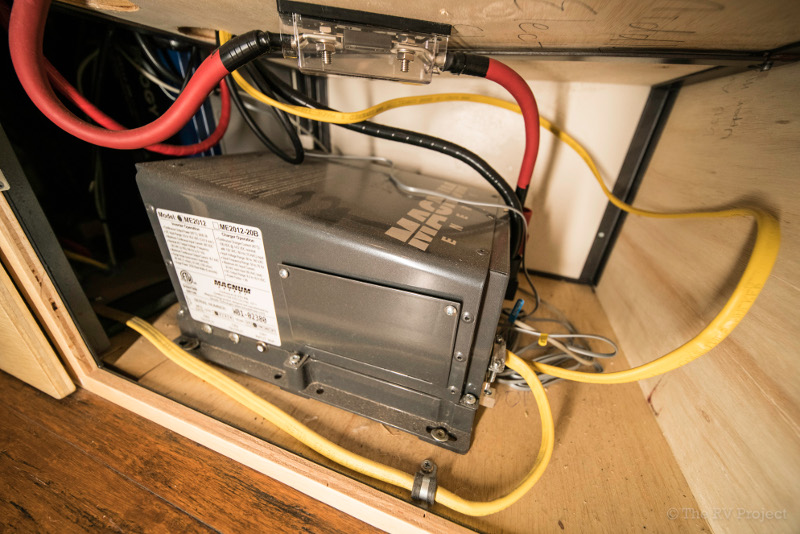
When we’re in movie editing mode, the displays, processors, and hard drives draw 15-25A (amps) of power, which is supplied by a pair of 127-pound, 200 Ah (amp-hour) 12V lead-acid batteries that are in turn part of a Renogy solar power kit. The batteries are charged by three roof-mounted panels of 100W each, and controlled by a 40A charge controller. Of course, any process that involves our precious electrical juice will itself have a cost, and that includes inverting. In order to supply the 120V that the computer stuff requires, we installed a 2000W inverter made by Magnum Energy. Just having the inverter on will burn about 4A.
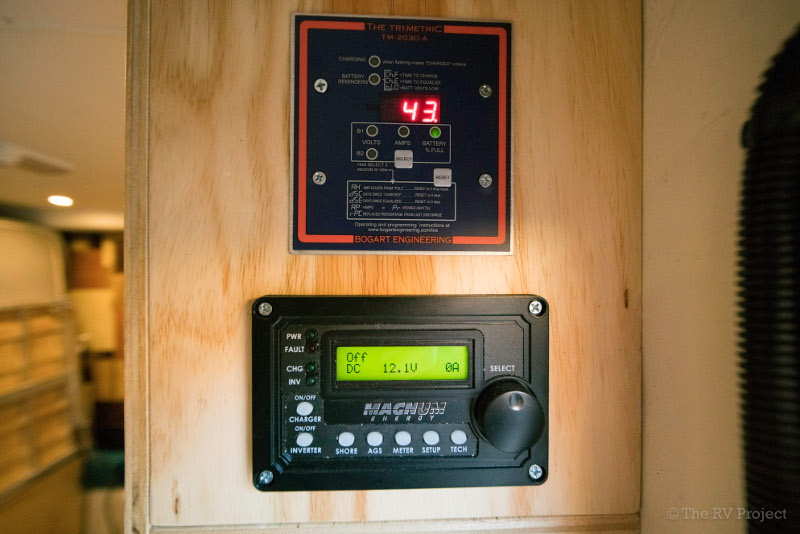
A battery is like a tank of gas, except it’s not. If you want to know how full it is, you can’t just pick it up and shake it. The item pictured here monitors our ins and outs, and tells us how much juice we have in the bank. It’s pretty frickin’ cool to watch the amperage fluctuate as we plug or unplug things, or as clouds pass.
A brief aside to mention that, thanks to Dustin and his voluminous van-veteran knowledge, our electrical system is not only infinitely more practical than it would’ve otherwise been, but infinitely safer. I would not have known to add in-line fuses and/or breakers to everything, but even cooler is this little item here:
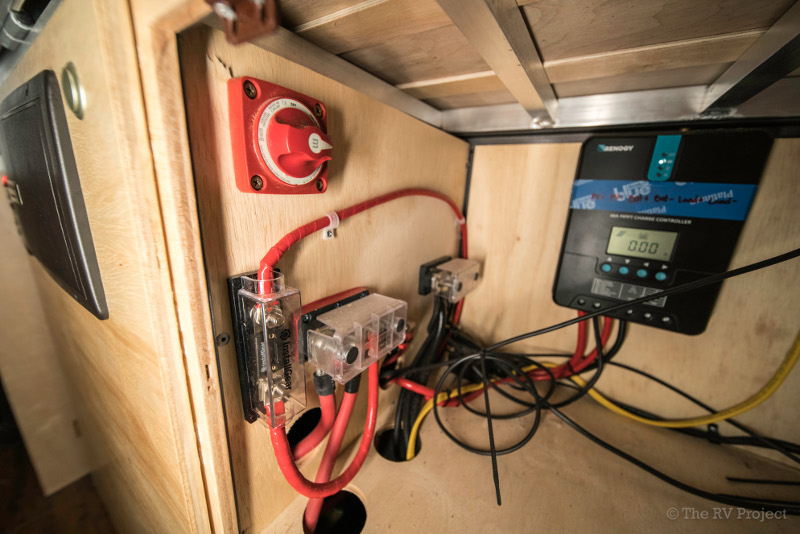
That red dial in the upper-left is the Master Switch. If something starts melting or smoking or arcing, we simply cut power to everything without having to literally cut cables (which, by the way, aren’t super cheap). The more likely use case is that we decide to tap into an existing circuit to add some components, and this switch will let us do so without having to worry about electrocuting ourselves.
AC/DC
Did you know that damn near all of your household appliances are actually using DC power? Yes, your wall sockets are supplying AC power. But your computer, microwave, TV, modem, etc. converts it to DC, which is a “cleaner” energy, before the electricity is sent to whatever circuits and motors perform the tasks. So there is some irony here, in that we are gathering solar energy and storing it as DC power, then inverting it to AC so that the iMac can convert it back to DC. However, before the Vansion showed up to help us out on the build, we were totally unaware of that and were planning to simply turn on the inverter and plug in LEDs for lighting. We learned that it was much more efficient to run everything possible off of DC current (lights, fridge, fan, phone chargers, etc.), and keep that inverter off whenever possible. Also, the inverter buzzes loudly. It’s a constant reminder of wasted power.
The Galley
Where we used to have a cooler, we now have a fridge. Instead of buying fresh veggies every two days, we can keep them for a week. Instead of having to eat leftovers for the very next meal, we can make big pots of soup and save ‘em. Also: cold beer is better. I admit I was reluctant to get a fridge. I’m glad Vikki convinced me otherwise, for the cold beer food-savings alone.
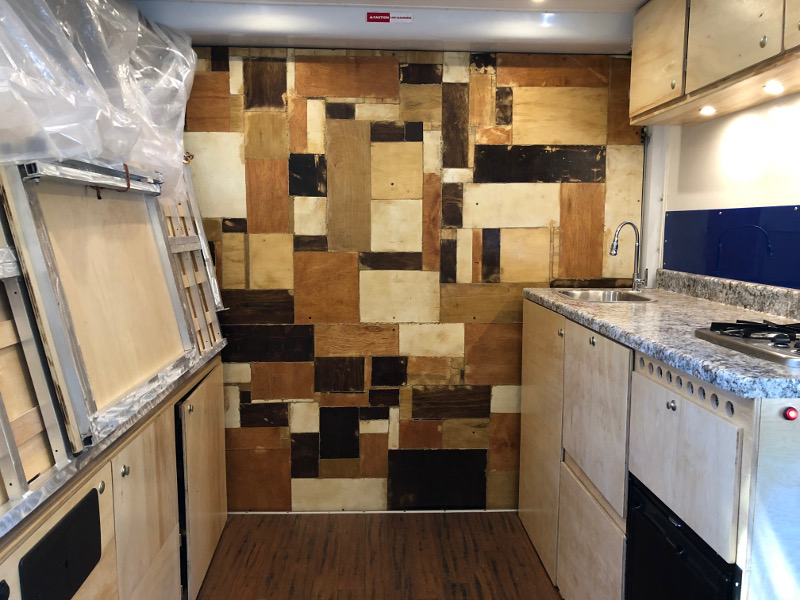
When we used to do dishes in a tub outside (or not at all, if it was raining), we now do them in the sink. Fresh water enters a 20-gallon tank through a gravity-assisted fill port, and is shot through the faucet by a 3gpm DC-powered water pump. Grey water drains into a 9-gallon tank (if we’re trying to be discreet), or straight to the ground if we’re in the boonies. Dishes now take ten minutes instead of half an hour plus incipient frostbite.
The Woodie
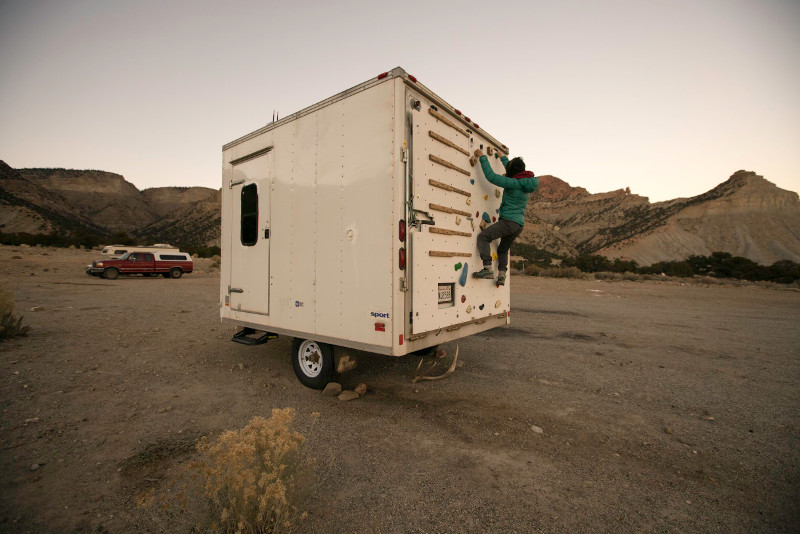
I’ve always been inspired by the British tradition of climbing poor holds on steep wooden boards in tiny cellars. When we realized the loading ramp was the perfect setup for a training wall that could easily adjust from 0-90°, well, you just don’t pass up an opportunity like that. And, when I asked the proverbial homies if anyone had extra plywood panels available, our good pal Neill came through with an excess of painted, textured, and T-nutted panels that were leftover from Walltopia’s build at Dogpatch. Score! (Now we just need a dingy cellar to park the trailer in…)
Anyone who has built a climbing wall knows that, like marching through Mordor, it is not something that one simply does. In our case, we had to factor in the following:
- Adding fasteners (like screws) to the trailer’s skin means more places for water to enter and f*&% s*%& up.
- The panels were designed for the indoors. We anticipate every kind of outdoor weather.
- Bolts almost always extend past the backs of the T-nuts, and if the wall is mounted flush to the trailer, those bolts will poke more holes in the skin.
We pulled out the T-nuts, soaked ‘em in vinegar to get rid of incipient rust, and then sprayed them with a sealing enamel. We sanded the panels and painted a few coats of primer on each side to keep the rain and ultraviolet light at bay.
Using some leftover angle iron, I fashioned 12 sets of brackets, and with much finagle and finick, we managed to get both panels bolted on. It’s not a perfect system, but the wall is now detachable, in case we need to detach it. More importantly, it’s offset ~1” from the skin, providing plenty of extra room for screws and bolts, and allowing any precipitation to drain and dry.
 Stay tuned next week for Part 3 for overall lessons learned, things we didn’t consider but wish we had, miscellaneous musings, and more sweet pics.